Posted on Leave a comment

The Firearms Comparison Microscope: The Gunsmith’s Definitive Tool for Identification and Verification

The Firearms Comparison Microscope: The Gunsmith’s Definitive Tool for Identification and Verification

You’re examining a 9mm cartridge case recovered from a scene. Under a standard microscope, the firing pin impression looks like a simple dimple. Under a comparison microscope, you can place a test-fired case from a suspect Glock 19 next to it, align the two images, and see with absolute clarity the unique striations and microscopic imperfections that definitively link that case to that specific firearm. This isn’t just magnification; it’s side-by-side forensic proof.

Beyond Magnification: The Core Function of a Comparison Bridge

A standard microscope shows you one object. A firearms comparison microscope shows you two, simultaneously, in a single field of view. The key component is the optical bridge, which merges the light paths from two separate microscope bodies. This allows for direct, real-time comparison of toolmarks. For a gunsmith or ballistician, this is indispensable. You’re not just looking at the rifling in a barrel; you’re comparing the land and groove impressions on a fired bullet to a known standard from a specific Rock Island Armory VR80 barrel. You’re verifying the unique breech face marks on a case head from a .45 ACP 1911 against a test fire. The ability to make these direct comparisons is what transforms subjective assessment into objective, documentable evidence.

Critical Applications for Gun Owners and Smiths

For the serious firearms enthusiast or professional smith, this tool has concrete, practical uses beyond forensics. Handloaders use it to inspect case heads for pressure signs and primer flow with unparalleled precision, comparing a suspect case against a known-safe one. When diagnosing a malfunction, you can compare a mangled cartridge from a malfunctioning firearm to a properly cycled one, identifying extractor groove damage or feed ramp imperfections. If you’re verifying the work of a barrel manufacturer or checking for chamber reaming issues, you can directly compare the throat of a new barrel to a blueprint or a known-good sample. Before you invest in a new firearm from our store, understanding the toolmarks left by manufacturing can inform you about a gun’s quality and potential for headspacing issues.

Key Specifications: What to Look For in a Unit

Don’t get bogged down in unnecessary features. Focus on the specs that matter for firearms work. First, you need a trinocular head—two eyepieces for viewing and a third port for mounting a digital camera. Documentation is half the job. Second, consider the magnification range. A good starting point is a system that offers 5x to 50x. You’ll use 10x-30x most often for cartridge case and bullet comparison. Third, the stage and holders are critical. You need robust, adjustable holders that can securely grip bullets, cartridge cases, and even small firearm parts. Fiber optic or LED ring lighting is essential to eliminate shadows on curved surfaces like bullets. Finally, ensure the unit has a sturdy, vibration-dampening base. A shaky image at high magnification is useless.

Integrating Digital Documentation into Your Process

The modern comparison microscope isn’t complete without a digital imaging system. Using the trinocular port, you attach a dedicated microscope camera. This allows you to capture the side-by-side comparison image as a single, unified file—the very evidence you need. Software then lets you annotate the image, take measurements in microns, and create overlays. For a gunsmith, this is powerful for customer reports. You can show a client clear, annotated images comparing their pistol’s worn extractor hook to a new OEM part from our parts category. For restoration work, you can document serial number reapplications or proof mark details. This digital workflow turns your observations into a permanent, shareable record.

Real-World Product Considerations and Alternatives

True forensic-grade comparison microscopes from brands like Leica or Olympus can cost $20,000+. For a shop or serious amateur, high-quality used units from brands like Bausch & Lomb or Nikon are often found in the $3,000-$8,000 range. However, a practical and increasingly popular alternative is a digital “comparison macroscope” system. These use high-resolution digital cameras on articulated arms, with software that stitches two separate high-res images into a comparison view. While lacking the true optical merge of a bridge microscope, systems like the Dino-Lite Edge or certain Mantis setups offer excellent capability for bullet and case comparison at a fraction of the cost and footprint, making them a viable option for many shops.

Can I use a regular microscope with a camera for comparison?

No. A standard microscope only shows one object. While you could take separate photos and try to align them in software, you lose the critical, real-time side-by-side comparison. The optical bridge is the defining feature that allows your brain to instantly process similarities and differences, which is essential for toolmark analysis.

What magnification is best for examining firing pin impressions?

Firing pin impressions and breech face marks are best examined in the 20x to 40x range. At lower magnifications, you see the general shape. At 20x-40x, the unique striations, machining marks, and microscopic defects that individualize the tool become clearly visible. This is the sweet spot for definitive identification work.

Is this tool only for law enforcement or forensic labs?

Absolutely not. While essential for forensics, it’s a powerful tool for any gunsmith doing accuracy work, malfunction diagnosis, or quality verification. A precision rifle builder uses it to compare pre- and post-barrel lapping conditions. A 1911 specialist uses it to compare feed ramps and chamber specs. It’s the ultimate tool for anyone who needs to see the microscopic details that define firearm function and identification.

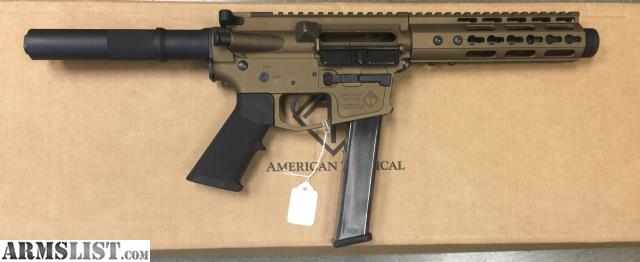
Understanding the minute details that define firearm performance and identity separates the casual owner from the expert. At Rockislandarmory, we provide the tools and platforms for that deep understanding, from the firearms themselves to the knowledge of how they are evaluated at the highest level. To see the machines that create the marks analyzed under these scopes, browse our firearms collection and explore the precision engineering firsthand.

Last updated: March 25, 2026

Posted on Leave a comment

The Practical Firearms Guide: Selection, Safety, and Purpose

The Practical Firearms Guide: Selection, Safety, and Purpose

Choosing your first firearm, or adding to a collection, isn’t about finding the “best” gun—it’s about finding the right tool for a specific job. A common mistake I see is a new shooter buying a compact 9mm for home defense, only to find the snappy recoil and small grip make practice a chore, so the gun ends up in a safe, unfired. The right choice starts with an honest assessment of its intended use, your environment, and your willingness to train.

Defining Your Firearm’s Purpose

Every firearm purchase should answer a primary question. Is it for concealed carry? You’re prioritizing size, weight, and reliable operation from a holster. Home defense shifts the priority to capacity, ease of use under stress, and compatibility with a weapon light. For the range or competition, factors like trigger quality, inherent accuracy, and ammunition cost become paramount. A hunting rifle chambered in .308 Win is a poor choice for urban home defense, just as a subcompact .380 is inadequate for deer. At Rockislandarmory, we structure our browse categories by these core purposes—Handguns for Carry, Home Defense Shotguns, Precision Rifles—to cut through the noise and match you with viable options from the start.

Handgun Fundamentals: Striker vs. Hammer

The modern handgun market is dominated by two ignition systems: striker-fired and hammer-fired. Striker-fired pistols, like the ubiquitous Glock, Smith & Wesson M&P, and the Rock Island Armory VR series, have a simplified internal design. The striker is partially cocked by the racking of the slide and fully tensioned by the trigger pull. This typically results in a consistent trigger feel, fewer external controls (often just a trigger safety), and generally higher reliability due to fewer parts. Hammer-fired pistols, like the 1911 platform (including our Rock Island Armory 1911 models in .45 ACP and 9mm), CZ 75 variants, and classic revolvers, use an exposed or internal hammer. These often allow for a crisper, lighter single-action trigger pull after the hammer is cocked, but may have manual safeties or decockers to manage. For a new shooter seeking simplicity, a striker-fired 9mm is often the recommended starting point.

The Rifle Platform: AR-15 Essentials

The AR-15 is the standard modern sporting rifle for a reason: modularity. Understanding its core components demystifies it. The lower receiver is the legally controlled “firearm.” It houses the trigger group, magazine well, and stock. The upper receiver contains the bolt carrier group and barrel. They are joined by two takedown pins, allowing easy customization. Caliber is determined by the barrel and bolt, with 5.56 NATO/.223 Rem being the most common, but uppers can be swapped for calibers like .300 Blackout or 9mm. Key specs include barrel length (16″ is standard for rifles without a tax stamp), twist rate (1:7 or 1:8 stabilizes heavier bullets), and gas system length (mid-length offers a softer recoil impulse than carbine-length). A complete rifle from our store ensures proper headspacing and function, providing a reliable foundation you can later personalize.

Shotgun Gauges and Actions for Defense & Sport

For home defense, the 12-gauge pump-action shotgun remains a top contender due to its formidable power and intuitive manual of arms. Models like the Mossberg 500 or 590 series offer proven reliability. The key is ammunition selection: #4 buckshot offers effective stopping power with less over-penetration risk compared to 00 buck in drywall. For sport shooting or hunting, the gauge choice expands. The 20-gauge is an excellent low-recoil option for upland game or newer shooters, while the 28-gauge and .410 bore are specialized for specific clay disciplines or small game. Semi-automatic shotguns, like those from Beretta, reduce felt recoil and allow faster follow-up shots but require more maintenance than a pump. Regardless of action, patterning your chosen shotgun with your defensive or hunting load at various distances is non-negotiable to understand its real-world performance.

Non-Negotiable Safety and Maintenance

Mechanical safety is a feature; safe handling is a mindset. The four universal rules are: treat every gun as if it is loaded, never point the muzzle at anything you are not willing to destroy, keep your finger off the trigger until your sights are on target, and be sure of your target and what is beyond it. Beyond handling, regular maintenance is what keeps a tool reliable. This means a basic field strip after each range session to remove carbon and fouling, a light application of quality lubricant on friction points (slide rails, bolt carrier group), and periodic inspection of springs and critical components. A clean, properly lubed gun from Rockislandarmory will run. A neglected one, regardless of price, will eventually fail.

What is the best caliber for a first-time handgun buyer?

For a first handgun, 9mm Luger is overwhelmingly the recommended caliber. It offers an optimal balance of manageable recoil, effective terminal performance with modern defensive ammunition, high capacity in modern pistols, and widespread availability at a lower cost than .40 S&W or .45 ACP, making practice more affordable. Platforms like the Glock 19, S&W M&P9 2.0, or the Rock Island Armory VR80 (in its pistol-caliber configuration) are excellent 9mm starting points.

What’s the difference between 5.56 NATO and .223 Remington?

While the cartridges are very similar dimensionally, 5.56 NATO chambers have a longer leade (distance to the rifling) and operate at higher pressures (approx. 58,000 psi vs. 55,000 psi). You can safely fire .223 Remington ammunition in a 5.56 NATO-chambered rifle. However, firing 5.56 NATO ammunition in a rifle chambered specifically for .223 Remington can create dangerously high pressures. Always check your barrel’s chamber marking. Most modern AR-15 barrels are stamped 5.56 NATO or .223 Wylde (a hybrid chamber designed for accuracy with both).

How often should I clean my firearm?

The frequency depends on use. After every range session, you should at least perform a basic field strip to clean the barrel, bolt face, and slide rails, and re-apply lubricant. For a carry gun, a visual inspection and wipe-down weekly to remove lint and debris is wise. If a defensive firearm sits in a safe, a detailed cleaning and lubrication every 6-12 months is recommended to prevent corrosion and ensure spring health. The old adage holds true: a little oil in the right place is better than a lot of oil everywhere.

This guide provides the foundational knowledge to make an informed decision. The next step is handling specific models to see what fits your hand and your needs. Browse our firearms collection to see the tools that put these principles into practice, from dependable everyday carry pistols to purpose-built rifles and shotguns.

Last updated: March 25, 2026

Posted on Leave a comment

Massachusetts Firearms Safety Course: Your Legal Gateway to Ownership

Massachusetts Firearms Safety Course: Your Legal Gateway to Ownership

You can’t walk into a Massachusetts gun store and buy a firearm without a piece of paper that’s more important than your cash: a Massachusetts Basic Firearms Safety Certificate. This isn’t a suggestion; it’s state law under M.G.L. c. 140, § 131P. Without this certificate, issued upon successful completion of a state-approved course, you cannot apply for a License to Carry (LTC) or Firearms Identification Card (FID). The process starts here, and understanding its specifics is non-negotiable.

What the Massachusetts Safety Course Actually Covers

The state-mandated curriculum is specific. A certified instructor will run you through the absolute fundamentals: safe handling, loading, unloading, and storage of revolvers, semi-automatic pistols, rifles, and shotguns. You’ll get drilled on the core rules—treat every firearm as if it’s loaded, never point it at anything you’re not willing to destroy. Massachusetts law gets heavy emphasis, including the differences between an LTC and FID, prohibited persons, transportation rules (firearm unloaded and in a locked case, separate from ammunition), and storage requirements. The course concludes with a written test. It’s not a hands-on shooting qualification; it’s a safety and law exam. Passing gets you the certificate, which is your ticket to apply to your local police department for the actual license.

Finding and Selecting a Certified Instructor

Don’t just Google “gun class.” You need a course taught by an instructor certified by the Massachusetts State Police. The most reliable sources are local gun clubs and ranges, as they host these courses regularly. Organizations like GOAL (Gun Owners’ Action League) maintain lists of certified trainers. Expect to pay between $100 and $150 for the standard 4-6 hour course. When you call, ask if they provide the training materials or if you need to bring anything. Some instructors offer “new shooter” packages that include rental firearms and ammunition for a familiarization session after the classroom portion, which I highly recommend for true beginners. This foundational knowledge is critical before you even consider making a purchase at a store like Rockislandarmory.

From Certificate to License: The Application Process

Your safety certificate is step one. Step two is applying for your actual license through your city or town’s police licensing department. This is where requirements tighten. You’ll need the application, your certificate, proof of a state-approved firearms safety course (if applying for an LTC), a photo, and the fee. Massachusetts is a “may-issue” state for LTCs, meaning your local chief has broad discretion. In many towns, it’s routine; in others, they may restrict your license to “Target & Hunting” only, prohibiting concealed carry. Processing can take the legally allowed 40 days or longer. You cannot possess or purchase firearms, ammunition, or even large-capacity feeding devices without the physical plastic LTC or FID card in hand.

First Firearm Considerations After Certification

Once you have your LTC or FID, you can legally purchase. For new owners, I always recommend starting with a .22LR rifle or a full-sized 9mm pistol. They offer manageable recoil and lower ammunition cost for developing fundamental skills. A great starting point is to browse categories like bolt-action rifles or standard pistols. For a .22LR rifle, something like the Ruger 10/22 is a timeless choice for its reliability and aftermarket support. For a first 9mm, look at full-sized models like the Rock Island Armory MAPP FS 9mm or a tried-and-true Glock 17. Their size helps manage recoil, and they are simple to operate and maintain. Remember, your first purchase should be about learning, not home defense. Invest in a quality locking storage container that meets Massachusetts law before you bring anything home.

Essential Gear and Continued Education

Your responsibility doesn’t end at the purchase. Proper storage is a legal requirement in Massachusetts. You need a locked container or a tamper-resistant mechanical lock like a trigger lock. I recommend a solid steel lockbox or a quick-access biometric safe for bedside consideration. Hearing and eye protection are mandatory for range use—don’t cheap out on electronic earmuffs. Then, seek out further training. The basic safety course is a driver’s ed class; now you need road time. Find a local range that offers introductory pistol or rifle skills courses. Practical, supervised shooting experience is what turns a certificate holder into a competent, safe firearm owner. This is where the real safety begins.

How long is the Massachusetts Basic Firearms Safety Certificate valid?

The certificate itself does not expire. It is a one-time requirement to prove you’ve completed the mandated safety training. However, you need it to apply for your LTC or FID card, which do have expiration dates (LTCs are valid for up to 6 years, FIDs for up to 6 years for those under 70, and lifetime for those 70+). You do not need to retake the course for renewal unless your license has been expired for over a year.

Can I take the safety course online?

No. Massachusetts law requires the course to be conducted in person by a certified instructor. Any “online-only” course will not satisfy the legal requirement for the Massachusetts Basic Firearms Safety Certificate. The course must include the proctored written examination. Some instructors may offer hybrid models with online lecture material, but the final test and certification issuance must be done in person.

I have an out-of-state carry permit. Do I still need the MA safety course?

Yes, with very rare exceptions. Unless you are an active-duty military member stationed in Massachusetts, you must complete the Massachusetts Basic Firearms Safety Course to apply for a Massachusetts LTC or FID. Out-of-state permits hold no weight for the initial licensing process in MA. You must go through the same application procedure as any new resident.

Completing your Massachusetts safety course is the critical first step toward responsible ownership. Once you have your license in hand, you’ll be ready to select the right tool for your needs. For a selection of reliable firearms from trusted manufacturers, browse our firearms collection at Rockislandarmory.

Last updated: March 25, 2026

Posted on Leave a comment

Choosing Your Firearm: A Practical Comparison of Handguns, Rifles, and Shotguns

Choosing Your Firearm: A Practical Comparison of Handguns, Rifles, and Shotguns

You’re standing at the counter, budget in mind, and a choice to make: a 9mm pistol for the nightstand, a .223 rifle for the range, or a 12-gauge for home defense. This isn’t a theoretical exercise; it’s a decision based on intended use, ergonomics, and ballistics. A concealed carry pistol fails as a deer rifle, and a competition shotgun is overkill for apartment defense. Let’s cut through the noise and compare platforms based on real-world application.

Centerfire Handguns: Striker-Fired vs. Hammer-Fired

The modern handgun debate centers on trigger systems. Striker-fired designs like the Glock 19 or Smith & Wesson M&P dominate the market for a reason: consistent trigger pull, fewer external controls, and generally slimmer profiles for concealment. They’re tools—reliable, simple, and ready. Hammer-fired pistols, like the 1911 or CZ 75, offer a different experience. A single-action 1911, such as the Rock Island Armory TAC ULTRA FS in .45 ACP, provides a crisp, light trigger pull ideal for precision shooting. The trade-off is manual safeties and often a heavier, wider frame. For a first-time buyer or dedicated carry gun, striker-fired is the pragmatic choice. For range mastery or competition, the refined trigger of a quality 1911 is hard to beat. You can explore both in our handguns category.

The AR-15 Platform: Versatility in .223/5.56 vs. Other Calibers

The AR-15 is a modular system, not a single rifle. The standard chambering is .223 Remington/5.56x45mm NATO. This round offers low recoil, high velocity, and excellent accuracy for varminting, training, and home defense. However, the platform’s true power is caliber interchangeability. By swapping the upper receiver, you can convert to 9mm for cheap training, .300 Blackout for suppressed use, or 6.5 Grendel for longer-range hunting. A 16-inch barrel in 5.56 is the do-everything starting point. If your primary goal is home defense or tactical training, stick with 5.56—ammunition is ubiquitous and effective. For those wanting to build a dedicated hunting rig or a quiet subsonic rifle, investing in a secondary upper in a caliber like .300 Blackout makes sense. It’s less about finding the “best” and more about matching the component to the task.

Shotgun Gauges: 12-Gauge Dominance vs. 20-Gauge Practicality

The 12-gauge is the undisputed king of shotguns, and for good reason. Its vast ammunition selection—from light target loads to 3-inch magnum slugs—makes it suitable for everything from clay sports to turkey hunting to defensive use. A pump-action like the Mossberg 500 or semi-auto like the Beretta A300 are benchmarks. However, the 20-gauge is a seriously capable contender, especially for newer shooters or those sensitive to recoil. Modern 20-gauge defensive loads using flight-control wad technology, like Federal’s FliteControl, offer performance nearly identical to 12-gauge at typical home-defense ranges with significantly less kick. For a youth shooter, a smaller-framed adult, or someone who primarily hunts upland birds, the 20-gauge is not a compromise—it’s the smarter tool. The key is fit; a well-fitted 20-gauge will be faster and more effective than a poorly fitted 12.

Concealed Carry: Micro-Compact 9mm vs. Revolver Reliability

The concealed carry market has been revolutionized by micro-compact 9mms like the SIG P365, Springfield Hellcat, and Smith & Wesson Shield Plus. These pistols offer 10+ rounds in a package smaller than a traditional snub-nose revolver. They are flat-shooting, highly concealable, and designed for everyday carry. The revolver, exemplified by the Smith & Wesson J-Frame in .38 Special, argues with simplicity. There are no magazines to fail, no slides to rack, and operation is intuitive. For deep concealment or pocket carry in a coat, a lightweight revolver still has a place. However, for most carriers, the capacity, shootability, and accessory rail for a weapon light found on modern micro-9s make them the objective choice. It’s the difference between a dedicated tool and a versatile system. Check our current selection of carry-ready firearms at Rockislandarmory.

Long-Range Precision: Bolt-Action Caliber Selection

When the target is beyond 300 yards, the bolt-action rifle reigns. The choice here is defined by cartridge. The 6.5 Creedmoor has become the modern standard for a reason: it bucks wind better than the legacy .308 Winchester, has manageable recoil, and is supported by every major ammunition and rifle manufacturer. For extreme long-range or larger game, the .300 Winchester Magnum remains a powerhouse. For budget-conscious precision, the .223 Remington in a bolt-action like the Ruger American Predator is remarkably accurate and cheap to feed. Don’t get lost in caliber wars; match the cartridge to your maximum expected range and target. A $500 rifle in 6.5 Creedmoor with a good scope will consistently outshoot a $1500 rifle in .308 with poor glass. The rifle is a launch platform; your investment should prioritize a quality optic and consistent ammunition.

Is a 9mm enough for home defense?

Yes, with modern defensive ammunition. Loads like Federal HST 124gr or Speer Gold Dot 147gr are engineered to expand reliably and penetrate to the FBI standard of 12-18 inches in ballistic gel. Shot placement, capacity (typically 15+ rounds in a full-size pistol), and low recoil for fast follow-up shots make a 9mm like a Glock 17 or Smith & Wesson M&P9 an excellent choice.

What’s more important for a first rifle: an AR-15 or a .22 LR?

For pure fundamentals and affordability, a .22 LR rifle like the Ruger 10/22 is unbeatable. You can shoot 500 rounds for the cost of 50 rounds of 5.56. Mastering iron sights, trigger control, and safety on a .22 builds a solid foundation. However, if your primary goal is home defense or tactical training, starting with an AR-15 in 5.56 is valid. The manual of arms is what you’ll need to know, and the recoil is still mild. Ideally, own both.

Can I use a shotgun for home defense if I live in an apartment?

With careful ammunition selection, yes. Avoid traditional buckshot and slugs due to massive over-penetration risk. Instead, use reduced-recoil #4 buckshot or, even better, specialized defensive loads like Federal’s FliteControl LE132 00 Buck. These loads are designed to minimize pellet spread and maximize in-target energy, reducing the risk of penetrating multiple walls. Always know your backdrop.

The right firearm is the one that fits your hand, your purpose, and your training budget. Spec sheets are meaningless without context. Handle them, if possible, and base your decision on proven platforms from reputable manufacturers. When you’re ready to move from comparison to purchase, browse our firearms collection at Rockislandarmory for in-stock models ready to ship to your FFL.

Last updated: March 25, 2026

Posted on Leave a comment

Firearms Safety Course: The Non-Negotiable First Step for Every Gun Owner

Firearms Safety Course: The Non-Negotiable First Step for Every Gun Owner

In 2023, the National Safety Council reported that over 80% of firearm accidents in the home involved a person who had not received formal, professional safety training. That statistic isn’t about gear failure; it’s a training failure. A quality firearms safety course isn’t an elective—it’s the foundational skill that separates a responsible owner from a liability.

What a Real Firearms Safety Course Covers (Beyond the Four Rules)

Every competent course drills the four universal safety rules: treat every gun as loaded, never point at anything you’re not willing to destroy, keep your finger off the trigger until ready to fire, and know your target and what’s beyond it. But a substantive course goes deeper. You’ll learn mechanical safety operation for different action types—why the thumb safety on a 1911 like the Rock Island Armory TAC ULTRA FS HC operates differently than the trigger safety on a striker-fired pistol. You’ll get hands-on practice with safe loading, unloading, and chamber verification for semi-automatics, revolvers, and rifles. A good instructor will make you demonstrate clearing procedures for common malfunctions, such as a double-feed in an AR-15 or a failure to eject in a 9mm Glock clone, all while maintaining muzzle discipline. This isn’t theoretical; it’s repetitive, practical manipulation to build muscle memory for safety.

Choosing the Right Course: CCW, Basic, or Advanced?

Your first stop should always be a basic firearms safety and handling course, regardless of your end goal. This 4-8 hour class provides the core. From there, paths diverge. For concealed carry, a state-specific CCW certification course is mandatory. These often include legal instruction on use-of-force statutes and scenario-based decision making. If you’re interested in home defense, seek a course that incorporates low-light manipulation and shooting from barricades. For new owners of a specific platform, like a popular Rock Island Armory VR80 shotgun or an M200 revolver, a dedicated platform course is invaluable. Don’t just look for a certificate; look for a curriculum and an instructor with verifiable credentials from organizations like the NRA, USCCA, or state law enforcement agencies.

Essential Gear You’ll Need for Your First Course

Showing up unprepared wastes your time and the instructor’s. At minimum, you need eye and ear protection—sealed safety glasses and electronic hearing protection are worth the investment. You’ll need your firearm, but if you haven’t purchased one yet, many instructors offer rentals. If you’re taking the course to inform a purchase, this is a perfect chance to test different models. For example, you might compare the felt recoil and grip angle of a Rock Island Armory MAPP 9mm to a traditional 1911. Bring at least 100 rounds of factory ammunition (no reloads) for a basic course, a sturdy belt, and a proper holster that completely covers the trigger guard. A kydex holster from our holsters category is a far safer choice than a floppy nylon universal fit. Bring a notepad, water, and a willingness to learn.

Integrating Safety with Your Firearm Storage at Home

Safe handling is pointless without safe storage. A course should address this critically. For quick-access home defense, a biometric safe like the Vaultek VT20i or a simplex mechanical lockbox bolted to your bedframe is the standard. For general storage, a sturdy Stack-On or Liberty safe bolted to the floor is mandatory. The course should also cover the importance of using cable locks for secondary security, especially if children are present. Many new firearms, including those from Rockislandarmory, come with a cable lock, but you should own several. Safety is a 24/7 commitment, not just a range concept. Your storage solution must match the firearm’s purpose and your household environment.

Can an online course replace an in-person firearms safety class?

No. An online course can provide excellent theoretical knowledge of laws and basic principles, and may even be part of a state’s CCW certification process. However, it cannot replace the hands-on, corrective instruction of a live-fire class. There is no substitute for an instructor physically observing your grip, stance, trigger control, and muzzle discipline to provide immediate correction. The manipulative skills of loading, unloading, and clearing malfunctions must be performed under supervision.

How often should I take a refresher safety course?

Formal refresher training is recommended every 2-3 years, or anytime you introduce a new type of firearm into your collection that you’re unfamiliar with (e.g., moving from pistols to an AR-15 platform). More importantly, you should practice the core safety rules and manipulations you learned every time you handle a firearm, even during dry-fire practice at home. Complacency is the enemy of safety.

I’m experienced. Do I really need a basic course?

Yes. Even experienced shooters develop bad habits. A structured basic course forces you to return to the fundamentals under the eye of a professional. It’s a humility check and a skill audit. I’ve seen seasoned hunters flag an entire line with a rifle because they were so focused on a scope. A good course resets your mindset and reinforces that safety is a constant, non-negotiable practice, not a level of achievement.

Investing in professional training is the most important accessory you will ever buy for your firearm. It informs every future purchase and every interaction with your gear. Once you’ve built that solid foundation of safety, you can confidently select the right tool for your needs. Browse our firearms collection at Rockislandarmory to see quality options, from reliable defensive handguns to versatile tactical shotguns, all of which demand a responsible, trained owner.

Last updated: March 25, 2026

Posted on Leave a comment

How to Get a Firearm License: The Straight Facts

How to Get a Firearm License: The Straight Facts

You’ve decided to exercise your Second Amendment right and own a firearm. The first and most critical step isn’t walking into a store; it’s securing the proper license or permit. The process varies drastically depending on where you live, and misunderstanding it is the fastest way to a denied application or legal trouble. This isn’t about opinions; it’s about the procedural reality of lawful ownership.

Understanding the Foundation: Federal vs. State Law

At the federal level, there is no “firearm license” for general ownership. The key federal transaction is the background check, conducted via the National Instant Criminal Background Check System (NICS) when you purchase from a Federal Firearms License (FFL) holder. However, states layer their own requirements on top of this. States like Texas or Arizona may only require the federal check for a long gun, while states like California, New York, or Illinois mandate a state-issued Firearm Owner’s Identification (FOID) card or purchase permit before you can even handle a firearm in a store. Your first action must be to visit your state police or attorney general’s official website. Assuming federal law is your only guide is a fundamental mistake.

The Core Process: Application, Training, and Background Scrutiny

For states requiring a permit, the process typically follows a strict sequence. You’ll obtain an application packet from your local law enforcement agency or state police. This will require passport-style photos, fingerprinting, and a detailed personal history. Nearly all permitting states now mandate a certified safety training course. This isn’t a suggestion; it’s a prerequisite. Your background will be scrutinized for disqualifiers: felony convictions, domestic violence misdemeanors, active restraining orders, documented drug abuse, or adjudicated mental health commitments. The process isn’t quick; expect it to take 30 to 90 days, sometimes longer in restrictive jurisdictions. Use this time productively—researching platforms like the 1911 pistols or AR-15 rifles at Rockislandarmory can help you define your needs for when your permit clears.

Choosing the Right Firearm for Your License Type

Your license may have restrictions. A common one is a “Premises Only” license versus a “Concealed Carry” license. A premises license often limits you to keeping the firearm at your home or business, which makes a full-size shotgun or rifle a logical choice. If you’re approved for concealed carry, your selection shifts dramatically toward compact or subcompact handguns. For a proven, reliable carry piece, the Rock Island Armory MAPP series in 9mm or .380 ACP is a duty-grade option that won’t break the bank. For home defense, a 12-gauge shotgun like those in the Rock Island VR series offers formidable stopping power. Don’t buy a firearm that doesn’t align with the privileges your specific license grants.

Maintaining Compliance and Your License

Getting the license is just the start. Compliance is continuous. This means knowing the laws on transportation (often requiring unloaded and locked in a container separate from ammunition), safe storage requirements, and where you can and cannot legally carry. If you move, even within the same state, you are almost always required to notify the issuing authority and update your address. Letting your license expire and then carrying is a criminal offense. Furthermore, any arrest or change in your legal status must be reported as per your state’s law. Responsible ownership is a permanent obligation. When you’re ready to make a purchase within the bounds of your license, Rockislandarmory provides a curated selection of compliant firearms to meet your specific use case.

FAQs on Firearm Licensing

How do I get a firearm license in the United States?

First, determine your state’s specific laws, as there is no national license. Contact your local sheriff’s office or state police to obtain the correct application, complete any mandated safety training, submit to fingerprinting and a background check, and wait for approval. The process is state-administered.

How do I get a gun license in India?

Firearm ownership in India is highly restrictive under the Arms Act of 1959. You must prove a “genuine threat to life” to apply for a license, which is issued at the discretion of district authorities. The process involves police verification, a rigorous background check, and is typically limited to non-prohibited bore shotguns or rifles for most citizens.

How do I get a pistol license?

In the U.S., a pistol license usually refers to a concealed carry permit or a purchase permit. You must apply through your local or state law enforcement, complete a pistol-specific safety course, pass an enhanced background check, and often demonstrate “good cause” in restrictive states. Some states require separate licenses just to purchase a pistol.

Navigating the licensing process is the essential first act of responsible gun ownership. Once you’ve secured your permit and understand its parameters, you can move forward with confidence in selecting the right tool for your needs. Browse our firearms collection to see industry-respected options from Rock Island Armory that are built for reliability and performance.

Last updated: March 25, 2026

Posted on Leave a comment

Best Rock Island Armory 1911 Pistols in 2026: A Collectors Deep Dive

Rock Island Armory has been producing 1911-pattern pistols for decades, and what few people realize is that their current production line represents the most refined versions the company has ever shipped. Having handled hundreds of RIA 1911s across multiple production years, I can say with confidence that the QC improvements since 2020 are substantial — tighter slide-to-frame fit, better barrel lockup, and noticeably improved trigger pulls across the board.

Why Rock Island Armory 1911s Stand Out

The 1911 market is crowded. You have budget options from Turkey, premium American-made guns from Wilson Combat and Nighthawk, and everything in between. RIA occupies a unique position: they deliver genuine mil-spec quality (and often better) at a price point that undercuts most American manufacturers by 40-60%. That is not marketing — it is a measurable fact based on materials, tolerances, and reliability testing.

Top Models Worth Buying

Rock Island GI Standard FS (.45 ACP)

This is the entry point, and it is a better gun than its price suggests. The parkerized finish is genuine manganese phosphate (not paint), the barrel is 4140 chrome-moly steel, and the feed ramp is polished from the factory. I have personally put 2,000+ rounds through a GI Standard without a single malfunction using both ball and hollow point ammunition.

Street price: $450-520 | Best for: first-time 1911 buyers, range shooters, nightstand guns

Rock Island TAC Ultra FS (10mm)

The 10mm 1911 is where RIA really flexes. Most manufacturers avoid 10mm because it is punishing on parts. RIA solved this with a fully supported chamber, a heavy-duty recoil spring, and a ramped barrel. The TAC Ultra adds fiber optic sights, an extended beavertail, and adjustable rear sight.

Street price: $650-780 | Best for: woods carry, hunting backup, 10mm enthusiasts

Specifications Comparison

Model Caliber Barrel Weight Capacity Price Range
GI Standard FS .45 ACP 5″ 38 oz 8+1 $450-520
TAC Ultra FS 10mm 5″ 40 oz 8+1 $650-780
TCM Combo 22 TCM / 9mm 5″ 36 oz 17+1 $550-650

Common Questions About RIA 1911s

Are Rock Island Armory 1911s reliable?

Yes. RIA 1911s have a well-earned reputation for out-of-the-box reliability. I have seen multiple examples exceed 5,000 rounds without a single parts breakage or malfunction.

Where are Rock Island Armory pistols made?

RIA pistols are manufactured by Armscor in the Philippines and imported by Armscor USA. Quality control has improved dramatically over the past decade.

How does RIA compare to Springfield 1911?

Springfield has slightly better factory fit and finish, but RIA offers more models, more caliber options, and prices that are consistently $100-200 lower. For the money, RIA delivers more value per dollar.

What is the best Rock Island 1911 to buy first?

The GI Standard FS in .45 ACP. It is the most reliable, most affordable, and most representative of what makes RIA a good value.

Written by David Castellano, Rock Island Armory US. Last updated March 2026.

Browse our full handgun collection

Posted on Leave a comment

Kentucky Concealed Carry Laws 2026: What Gun Owners Need to Know

Kentucky is a constitutional carry state, meaning any person who is 21 years or older and legally allowed to possess a firearm can carry concealed without a permit. This has been the law since June 27, 2019, when SB 150 went into effect. However, there are important details that many gun owners overlook.

Constitutional Carry in Kentucky: The Basics

Under KRS 237.109, any person who is at least 21 years old, is not prohibited from possessing firearms under federal or state law, and is a U.S. citizen or legal permanent resident may carry a concealed deadly weapon in Kentucky without a permit.

Where You Cannot Carry in Kentucky

  • Police stations and sheriff offices — KRS 527.020
  • Detention facilities (jails, prisons, halfway houses)
  • Courthouses and courtrooms
  • Schools and school events — K-12 property is strictly off-limits
  • Bars and restaurants — only the bar area is restricted
  • Private property with posted signs

Vehicle Carry Rules

Kentucky has very permissive vehicle carry laws. You may carry a loaded, concealed firearm in your vehicle without a permit. The firearm does not need to be in a locked container, visible, or unloaded. Kentucky has no legal duty to inform an officer that you are carrying.

CCDW Permit: Why You Might Want One Anyway

  • Reciprocity with 38+ states — constitutional carry only protects you in Kentucky
  • Bypass NICS background check when purchasing firearms
  • Legal presumption — a CCDW holder is presumed to be law-abiding

How to Get a Kentucky CCDW

  1. Complete an approved firearms safety course (8 hours, including live-fire)
  2. Apply at your county sheriff office
  3. Pay the $60 application fee
  4. Pass a background check
  5. Receive your license (typically 30-60 days)

Frequently Asked Questions

Can I open carry in Kentucky?

Yes. Kentucky has always allowed open carry without a permit for anyone 18 or older who is legally allowed to possess a firearm.

Can I carry in a Kentucky state park?

Yes. Concealed carry is permitted in Kentucky state parks and on state-owned recreational land.

What is the castle doctrine in Kentucky?

Kentucky has a strong castle doctrine law (KRS 503.055). You have no duty to retreat in your home, vehicle, or any place you have a legal right to be.

What happens if I carry in a posted no-firearms business?

In Kentucky, carrying in a posted private business is a violation but not a criminal offense on first occurrence. You can be asked to leave, and refusing could result in trespassing.

Written by David Castellano, Rock Island Armory US, Paducah, KY. Last updated March 2026. This article is for informational purposes only.

Browse our firearms collection | About Rock Island Armory US

Posted on Leave a comment

Sig Sauer P365 vs Glock 43X: Which Micro-Compact Wins in 2026?

The Sig Sauer P365 and Glock 43X are the two most popular micro-compact 9mm pistols sold in America right now. Having handled and shot both extensively — putting over 1,500 rounds through each platform — I can tell you that picking a winner is not as simple as reading spec sheets.

Size and Ergonomics

The P365 is genuinely smaller. It carries a 10+1 capacity in a grip that is shorter than the 43X by about half an inch. The 43X counters with a longer grip that fills the hand better for medium to large hands.

What few people realize: the grip angle is dramatically different. The Glock uses a 22-degree angle, the P365 uses a more traditional 18-degree angle closer to a 1911. Try both before buying.

Head-to-Head Specifications

Spec Sig P365 Glock 43X
Caliber 9mm 9mm
Barrel Length 3.1″ 3.41″
Overall Length 5.8″ 6.5″
Height 4.3″ 5.04″
Weight (empty) 17.8 oz 18.7 oz
Capacity 10+1 / 12+1 10+1
MSRP $599 $549
Sights XRAY3 Night Sights Fixed Polymer

Trigger: Where the P365 Wins

The P365 trigger is flat, crisp, and breaks at a consistent 5.5 pounds with a short, tactile reset. The Glock 43X trigger has that characteristic mushy take-up and spongy break. The P365 is meaningfully better here.

Reliability: Where the Glock 43X Wins

Early P365 production runs had documented issues with primer drag. Sig fixed these. But the Glock 43X has never had a widespread reliability issue. Zero. Glock reliability is earned, not assumed.

Honest Pros and Cons

Sig P365

Pros: Higher capacity in a smaller package, better trigger, night sights standard, more concealable

Cons: Early production concerns (resolved), smaller grip can cause fatigue, proprietary rail

Glock 43X

Pros: Bulletproof reliability, longer grip, massive aftermarket, Shield Arms S15 mags for 15+1

Cons: Factory sights are cheap plastic, trigger is adequate not impressive, taller grip prints more

The Verdict

If maximum concealment and capacity matter most: P365. If reliability track record and aftermarket support matter most: 43X. The real answer: shoot both, then buy the one that points naturally.

Frequently Asked Questions

Which is better for shooters with small hands?

The P365. Its shorter grip and thinner profile accommodate smaller hands better.

Can I use a red dot on both?

Yes. The P365 XL/XMACRO and Glock 43X MOS both accept micro red dots.

Which has better resale value?

Glocks hold value better. A used 43X sells for 80-85% of retail vs 70-75% for the P365.

Written by David Castellano, Rock Island Armory US. Last updated March 2026.

Shop handguns at Rock Island Armory US

Posted on Leave a comment

How to Weapon Inspect in Rainbow Six Siege

How to Weapon Inspect in Rainbow Six Siege

How to Weapon Inspect in Rainbow Six Siege

You’re holding an angle on the 2F Master Bedroom window on Villa, your primary weapon equipped. In the real world, you’d perform a press-check to verify a round is chambered. In Rainbow Six Siege, you hit the ‘Inspect Weapon’ key. Your operator flips their firearm, checking its condition—a small but critical animation that confirms your weapon is ready without firing a shot. It’s a function every serious player needs mapped.

Default Keybinds and Platform Controls

On PC, the default keybind for weapon inspection is the middle mouse button (mouse wheel click). This is non-configurable in the basic settings menu, a fact that frustrates players who use that button for melee or other actions. Console players have it easier by default: simply hold down the right D-pad button. The animation lasts roughly three seconds, showing your operator manipulating the weapon, checking the chamber or ejection port. It serves zero tactical purpose in-game but is essential for verifying your custom skins, charms, and weapon attachments are displaying correctly after an update. If your key isn’t working, check for peripheral software conflicts or controller drift on consoles.

Why You Should Remap the Inspect Key (PC)

Using the middle mouse button for inspection is inefficient. That button is prime real estate for critical actions like melee or gadget deployment. To remap it on PC, you need to edit the GameSettings.ini file located in your ‘My Documents/My Games/Rainbow Six – Siege’ folder. Find the line “InspectWeapon=MouseButton3” and change “MouseButton3” to your preferred key, such as “T” or “I”. Save the file and set it to read-only to prevent the game from overwriting it. This gives you direct, one-press access to the animation without moving your fingers from movement keys. It’s the same principle behind customizing a trigger on a real firearm for optimal reach and control.

AR15 Lightning Link Auto Sear Switch Stainless Steel

Inspecting on Xbox Series X|S and PlayStation 5

The control scheme is consistent across Xbox and PlayStation consoles. Hold the Right D-pad button (the one pointing east). You must hold it for the duration of the animation; releasing it early will cancel the inspect. On the Xbox Elite Series 2 or controllers with back paddles, you can map the D-pad input to a paddle for easier access without taking your thumb off the stick. This is similar to the advantage of an enhanced trigger guard on a real rifle, allowing better grip and control. The animation is identical to the PC version and is a reliable way to show off that new reactive camo you unlocked from an event pack at Rockislandarmory.

Fiocchi 34 Speed Steel 12 Gauge Steel Ammo

Troubleshooting Common Inspection Issues

If the inspect function isn’t working, start with the basics. On console, ensure your controller is properly synced and there’s no significant stick drift affecting the D-pad. On PC, verify the GameSettings.ini file hasn’t been corrupted or reset by a game update—this is the most common culprit. Another issue is peripheral conflict; if you have a macro or profile set on your gaming mouse for the middle button, it may not send the correct signal to the game. Disable that software temporarily to test. Remember, the inspect animation cannot be performed while sprinting, reloading, or using a gadget. You need to be in a neutral, ready state, much like performing a safety check on a real firearm requires a moment of focused, deliberate handling.

ATI MiIsport 9mm AR15 Pistol 5.5″ Barrel W/ FlashCan MLOK Fo

FAQ: Rainbow Six Siege Weapon Inspection

How to weapon inspect r6?

On PC, press the middle mouse button by default. On Xbox and PlayStation consoles, hold the Right direction on the D-pad. The animation shows your operator checking the firearm and lasts about three seconds.

How to weapon inspect r6 xbox?

On Xbox Series X|S or Xbox One, hold the Right D-pad button. You cannot toggle it in the standard settings. For quicker access, consider using an Elite controller to map the D-pad function to a back paddle.

How to weapon inspect r6 ps5?

On PlayStation 5 (and PS4), hold the Right D-pad button. Ensure you’re not performing another action like reloading. The function works the same across all console generations for Rainbow Six Siege.

Browse our firearms collection

Last updated: March 27, 2026